12 個很棒的 CSS3 特性,你終於可以開始使用了
如果您像我一樣,當您看到一個令人印象深刻的新 CSS3 功能演示時,您會迫不及待地開始在網站中使用它。當然,然後您會看到它僅在一兩個主要瀏覽器中可用(這從不包括 IE),因此最終您決定等待。我要告訴你一個好消息 - 在最新的瀏覽器版本中,有一些很棒的功能終於在所有地方都得到了支持,你現在就可以開始使用它們了!
請注意——這些功能中的大多數在舊版本的 IE(9 及以下)中都不起作用。如果這些瀏覽器佔您人口的很大一部分,恐怕您將不得不依賴後備。但對於我們其他人來說,現代瀏覽器必須提供以下功能:
1。 CSS 動畫和過渡
CSS 動畫終於可以在所有主流瀏覽器中使用,甚至在 IE(從版本 10 開始)。創建 CSS 動畫有兩種方法。第一個很簡單,通過 transition 動畫化 CSS 屬性的變化來完成 宣言。使用過渡,您可以創建懸停或鼠標按下效果,或者您可以通過使用 JavaScript 更改元素的樣式來觸發動畫。你可以通過將鼠標懸停在地球上來看到下面的過渡 - 這將導致火箭靠近。
定義動畫的第二種方式稍微複雜一些——它涉及到使用 code>@keyframe 規則來描述動畫的特定時刻。這允許您擁有不依賴於用戶操作或 JavaScript 來觸發的重複動畫。點擊編輯 按鈕查看代碼。
.container{
    width: 300px;
    height:300px;
    margin: 0 auto;
    position:relative;
    overflow:hidden;
}

.planet{
    position:absolute;
    top:0;
    left:0;
    width:100%;
    height:100%;
    background:url(https://demo.tutorialzine.com/2013/10/css3-features-you-can-finally-use/assets/img/planet.png) no-repeat center center;
}

.rocket{
    position:absolute;
    top:0;
    left:0;
    width:100%;
    height:100%;
    background:url(https://demo.tutorialzine.com/2013/10/css3-features-you-can-finally-use/assets/img/rocket.png) no-repeat 50px center;

    /* Chrome still requires the -webkit- prefix */
    -webkit-animation:orbit 2s linear infinite;
    animation:orbit 2s linear infinite;

    transition:background-position 0.8s;
}

.container:hover .rocket{
    background-position:80px center;
}

/* Define the keyframes of the animation */

@-webkit-keyframes orbit {
    from {
        -webkit-transform:rotate(0deg);}
    to {
        -webkit-transform:rotate(360deg);
    }
}

@keyframes orbit {
    from {
        transform:rotate(0deg);

        /* I am including the -webkit-transform properties, because
           Chrome might start supporting keyframe without prefix in the future,
           but we can't be certain whether it will support prefix-free transform
           at the same time */

        -webkit-transform:rotate(0deg);}
    to {
        transform:rotate(360deg);
        -webkit-transform:rotate(360deg);
    }
}
<div class="container">
<div class="planet"></div>
<div class="rocket"></div>
</div> 有很多關於 CSS 動畫的知識,我建議你從這篇 Mozilla 開發者網絡 (MDN) 文章開始。如果您對瀏覽器支持感到好奇,請參閱此兼容性表。
2。使用 calc() 計算值
另一個很棒的 CSS 新特性是 calc() 功能。它允許您在 CSS 中進行簡單的算術計算。您可以在任何需要長度或尺寸的地方使用它。更酷的是,您可以自由混合不同的單位,例如百分比和像素。這使您過去可能使用過的許多佈局技巧都過時了。最好的消息?它適用於 IE9 及更高版本,無需前綴。
.container{

    /* Calculate the width */
    width: calc(100% - 40px);

    background-color:#CDEBC4;
    color:#6D8B64;
    text-align:center;
    padding:25px 0;
    margin: 0 auto;
}
<div class="container">
<p>This div has 20px on either side.</p>
</div>
詳細了解 calc() 功能在這裡,或查看兼容性表。
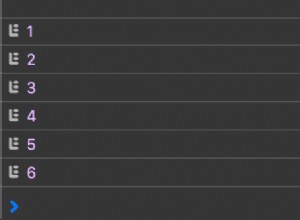
3。高級選擇器
這些天來,如果您只為元素分配 ID 以便為它們設置樣式,那麼您可能做錯了。 CSS 2.1 和 CSS 3 引入了許多強大的選擇器,可以讓你的佈局更乾淨,讓你的樣式表更棒。
所有主要瀏覽器都支持這些,包括 IE9 及更高版本。點擊編輯 查看示例的源代碼。
/* Style the elements (nothing interesting here) */

p{
    font-size: 16px;
    width: 420px;
    margin: 20px auto 0;
    text-align:center;
}

.container{
    width: 420px;
    margin:50px auto 0;
    overflow: hidden;
    padding:5px;
}

.elem{
    width:30px;
    height:30px;
    margin:4px;
    background-color:#A0DFAC;
    float:left;
}

.elem span{
    position:absolute;
    top:5px;
    left:5px;
    right:5px;
    bottom:5px;
    border:2px solid #fff;
}

/* Selectors for matching the first letter and line: */

p::first-letter{
    background-color: #666;
    color: #FFF;
    font-size: 24px;
    font-style:normal;
    display: inline-block;
    padding: 0 5px;
    border-radius: 3px;
    margin-right: 2px;
    font-family: serif;
}

p::first-line{
    font-size: 18px;
    text-transform: smallcaps;
    font-style: italic;
    text-decoration: underline;
}

/* Make the first and last elements purple */

.elem:first-child,
.elem:last-child{
    background-color:#948bd8;
}

/* Make every other element rounded */

.elem:nth-child(odd){
    border-radius:50%;
}

/* Make the sixth element red */

.elem:nth-child(6){
    background-color:#cb6364;
}

/* Style the element which contains the span */

.elem:not(:empty){
    background-color:#444;
    position:relative;

    -webkit-transform:rotate(25deg);
    transform:rotate(25deg);

}

/* Target elements by attribute */

.elem[data-foo=bar1]{
    background-color:#aaa;
}

.elem[data-foo=bar2]{
    background-color:#d7cb89;
}

/* The attribute value should start with bar. This matches both
   of the above elements */

.elem[data-foo^=bar]{
    width: 16px;
    height: 16px;
    margin: 11px;
}

/* The element that follows after the one with data-foo="bar2" attribute */

.elem[data-foo=bar2] + .elem{
    background-color:#78ccd2;
}
<p>This is a regular paragraph of text, which has a number of awesome CSS3 styles applied..</p>
<div class="container">
<div class="elem"></div>
<div class="elem"></div>
<div class="elem"></div>
<div class="elem"></div>
<div class="elem"></div>
<div class="elem"></div>
<div class="elem"></div>
<div class="elem"></div>
<div class="elem"></div>
<div class="elem"></div>
<div class="elem"></div>
<div class="elem"></div>
<div class="elem"></div>
<div class="elem"><span></span></div>
<div class="elem"></div>
<div class="elem"></div>
<div class="elem"></div>
<div class="elem" data-foo="bar1"></div>
<div class="elem" data-foo="bar2"></div>
<div class="elem"></div>
<div class="elem"></div>
<div class="elem"></div>
</div> 在此處了解有關這些選擇器的更多信息,或查看哪些瀏覽器支持它們。
4。生成的內容和計數器
生成的內容是開發人員手中的強大工具,由 ::before 提供 和 ::after 偽元素。此功能使您可以使用更少的 HTML 來實現相同的佈局。這在您需要額外的框陰影或其他需要額外跨度或 div 的視覺元素的情況下特別有用。最後,你會得到一個更簡潔、語義更正確的 HTML。
CSS3 還允許偽元素訪問計數器,可以使用 CSS 規則遞增。它們還可以從包含它們的父元素訪問屬性。請參閱下面示例的來源。
.container{

    /* Set a counter named cnt to 0 */
    counter-reset: cnt;

    position:relative;
    text-align:center;
    padding:20px 0;
    width:420px;
    height: 160px;
    margin: 0 auto;
}

/* You can style pseudo elements and give them content,
   as if they were real elements on the page */

.container::before{
    display: block;
    content:'Hover over these items:';
    font-size:18px;
    font-weight:bold;
    text-align:center;
    padding:15px;
}

.container span{
    display:inline-block;
    padding:2px 6px;
    background-color:#78CCD2;
    color:#186C72;
    border-radius:4px;
    margin:3px;
    cursor:default;
}

/* Create a counter with a pseudo element */

.container span::after{

    /* Every time this rule is executed, the
       counter value is increased by 1 */
    counter-increment: cnt;

    /* Add the counter value as part of the content */
    content:" #" counter(cnt);

    display:inline-block;
    padding:4px;
}

/* Pseudo elements can even access attributes of their parent element */

.container span::before{
    position:absolute;
    bottom:0;
    left:0;
    width:100%;
    content:attr(data-title);
    color:#666;

    opacity:0;

    /* Animate the transitions */
    -webkit-transition:opacity 0.4s;
    transition:opacity 0.4s;
}

.container span:hover::before{
    opacity:1;
}
<div class="container">
<span data-title="I have a wonderful title!">This is item</span>
<span data-title="These titles are shown only using CSS, no JavaScript is used!">This is item</span>
<span data-title="Hello there!">This is item</span>
<span data-title="Generated content is awesome!">This is item</span>
</div> 任何地方都支持生成的內容,包括 IE9 及更高版本。
5。漸變
漸變使網頁設計師能夠在顏色之間創建平滑過渡,而無需求助於圖像。 CSS 漸變在視網膜顯示器上看起來也很棒,因為它們是動態生成的。它們可以是線性的 或徑向 ,並且可以設置為重複。它們已經存在了一段時間,但是在過去幾個月中進行了一些小的語法更改之後,它們終於可以在幾乎所有地方使用,無需前綴!
.container{
    text-align:center;
    padding:20px 0;
    width:450px;
    margin: 0 auto;
}

.container div{
    width:100px;
    height:100px;
    display:inline-block;
    margin:2px;

    box-shadow: 0 0 1px rgba(0, 0, 0, 0.5) inset, 0 1px 1px #DDD;
    border-radius:2px;

    color:#666;
    vertical-align: top;
    line-height: 230px;
    font-size: 12px;
}

#el1{
    background:linear-gradient(to bottom, #8dd2d9 , #58c0c7);
}

#el2{
    background:radial-gradient(#77d19e,#46c17b);
}

#el3{
    background:repeating-linear-gradient(-45deg, #de9dd4, #de9dd4 5px, white 5px, white 10px);
}

#el4{
    background:repeating-radial-gradient(#b8e7bf, #b8e7bf 5px, white 5px, white 10px);
}
<div class="container">
<div id="el1">Linear</div>
<div id="el2">Radial</div>
<div id="el3">Repeating Lin.</div>
<div id="el4">Repeating Rad.</div>
</div> 在此處查看詳細教程,並在此處查看兼容性表。
6。網絡字體
你能想像有一段時間我們僅限於少數“網絡安全”字體而沒有別的嗎?很難相信,因為今天我們有像 Google Fonts 和 typekit 這樣的服務,只需在頁面中包含一個樣式表,您就可以嵌入漂亮的字體。甚至還有像 fontawesome 這樣的圖標字體,它包含漂亮的矢量圖標,而不是字母或數字。這一切都是通過 code>@font-face 規則實現的,它允許您定義字體的名稱、特徵和源文件,稍後您可以在 font 中引用它們 /font-family 聲明。
h1{
    /* Using the custom font we've included in the HTML tab: */
    font-family: Satisfy, cursive;
    font-weight:normal;
    font-size:24px;
    padding-top: 60px;
}
<link href="https://fonts.googleapis.com/css?family=Satisfy" rel="stylesheet" /> <h1>This is my pretty webfont!</h1>
請注意,由於瀏覽器的安全限制,我無法在上面的內聯編輯器中嵌入本地字體,因此我使用了來自 Google Webfonts 的字體。但是你可以在這裡看到一個工作示例。
通過一些變通方法,webfonts 可以在 IE6 之前的瀏覽器上運行。我上面提到的兩個託管服務會為您處理這些情況,因此您不必這樣做。
7。盒子尺寸
讓 CSS 初學者頭疼的最大原因是盒子模型。標準化機構可能有他們的理由,但是讓元素的 CSS 寬度和高度受其填充和邊框影響並不直觀。這個小(錯誤)功能會破壞佈局並造成嚴重破壞,但最終有一種方法可以通過使用 box-sizing 來恢復我們的理智 規則。您可以將其設置為 border-box ,這使得元素的行為完全符合您的預期。自己看:
.container{
    text-align:center;
}

.container div{

    /* Setting the box-sizing method: */
    box-sizing:border-box;

    /* Firefox still requires the -moz prefix */
    -moz-box-sizing:border-box;

    width:120px;
    height:120px;
    display:inline-block;
    vertical-align:top;
}

/* Thanks to box-sizing, we can set whatever padding and border
   we want, and the elements will still keep the same size */

#el1{
    color:#524480;
    background-color:#B2A4E0;
}

#el2{
    padding:8px;
    border:10px solid #9ec551;
    background-color:#fff;
}

#el3{
    padding:32px;
    background-color:#ccc;
}
<div class="container">
<div id="el1">Element 1</div>
<div id="el2">Element 2</div>
<div id="el3">Element 3</div>
</div> 在此處了解有關 box-sizing 規則的更多信息,或查看兼容性表。
8。邊框圖片
border-image 屬性允許您在元素周圍顯示自定義設計的邊框。邊框包含在單個圖像(精靈)中,該圖像的每個區域對應於邊框的不同部分。這是以下示例中使用的圖像。
p{
    text-align:center;
    padding:20px;
    width:340px;
    margin: 0 auto;

    /* Set the border and border image properties */
    border:30px solid transparent;
    border-image:url(https://demo.tutorialzine.com/2013/10/css3-features-you-can-finally-use/assets/img/border.png) 30 30 round;
}
<p>Say hello to a fancy border image!</p>
如需更深入的了解,請查看這個 MDN 頁面和這篇關於 CSS 技巧的文章。所有主流瀏覽器和 IE11 都支持邊框圖片。
9。媒體查詢
如果您認真對待網頁設計,媒體查詢是絕對必須的。它們已經存在了一段時間,但值得一提,因為它們改變了我們構建網站的方式。過去,您擁有一個常規網站,其寬度足以容納當時使用的最小顯示器分辨率,以及一個單獨的移動網站。如今,我們構建的網站具有響應能力,並能適應設備類型、方向和分辨率。
媒體查詢非常容易使用——您需要做的就是將 CSS 樣式包含在一個由 code>@media 規則保護的塊中。每個 code>@media 塊在滿足一個或多個條件時被激活。例如,嘗試調整此頁面的大小。我也將它包含在下面的編輯器中;嘗試刪除代碼>@media 塊看看會發生什麼。
/* Style the main content and the sidebar */

.container{
    width:900px;
    margin: 0 auto;
    overflow:hidden;
}

.main-section{
    background-color:#CDEBC4;
    color:#6D8B64;
    width:520px;
    float:left;
    height:500px;
}

.sidebar{
    background-color:#ccc;
    width:350px;
    float:right;
    height:400px;
}

.container p{
    padding-top:100px;
    text-align:center;
}

.note{
    text-align:center;
    padding-top:60px;
    font-style:italic;
}

/* This simple media query makes the column layout
   linear on smaller screens */

@media (max-width:900px){

    .container{
        width:100%;
    }

    .main-section, .sidebar{
        width:auto;
        margin-bottom:20px;
        float:none;
    }

}
<div class="container">
<aside class="sidebar"><p>This is the sidebar<p></aside>
<div class="main-section">
<p>The main content of the article goes here</p>
</div>
</div> 媒體查詢可以包含對設備分辨率和方向、顏色深度、像素密度等的檢查。在此處閱讀深度文章,並查看兼容性表。
10.多種背景
具有多種背景,設計師可以實現非常有趣的效果。他們可以將不同的圖像堆疊為同一元素的背景。每個圖像(或圖層)都可以獨立移動和動畫,就像您在下面的演示中看到的那樣(嘗試用鼠標懸停在圖像上)。所有與背景相關的 CSS 規則現在都可以採用逗號分隔的屬性列表,每個屬性都用於特定的背景圖像:
.space{

    /* Pass a comma separated list of backgrounds: */
    background:url('https://demo.tutorialzine.com/2013/10/css3-features-you-can-finally-use/assets/img/rocket_big.png') no-repeat center 70px, url('https://demo.tutorialzine.com/2013/10/css3-features-you-can-finally-use/assets/img/space.jpg') no-repeat bottom center;

    width:200px;
    height:200px;
    margin: 0 auto;

    border-radius:3px;

    /* Animate the positions of both of the backgrounds */
    transition:background-position 1s;
}

.space:hover{
    /* The same goes for properties like background-position and repeat */
    background-position:35% 20px, top right;
}
<div class="space"></div>
有關多種背景的更多信息,請參見此處。瀏覽器支持非常好——所有最新版本都支持該規則(見表格)。
11. CSS 列
眾所周知,基於列的佈局在 CSS 中難以實現。它通常涉及使用 JavaScript 或服務器端處理,將內容拆分為不同的元素。這是不必要的複雜,並且會佔用寶貴的開發時間而不是真正重要的事情。幸運的是,現在有一種方法可以使用 CSS columns 規則:
.container{
    width: 500px;
    margin: 0 auto;
}

/* Creating columns is as simple as this: */

.container p{
    -moz-columns:3;
    -webkit-columns:3;
    columns:3;
}
<div class="container">
<p>Lorem ipsum dolor sit amet, consectetur adipiscing elit. Maecenas pellentesque urna nec eros ornare, ac tristique diam porta. Donec fermentum velit eget dignissim condimentum. Sed rutrum libero sit amet enim viverra tristique. Mauris ultricies ornare arcu non adipiscing. Sed id ipsum vitae libero facilisis pulvinar id nec lacus. Ut lobortis neque et luctus mattis. Morbi nunc diam, elementum rutrum tellus non, viverra mattis diam. Vestibulum sed arcu tincidunt, auctor ligula ut, feugiat nisi. Phasellus adipiscing eros ut iaculis sagittis. Sed posuere vehicula elit vel tincidunt. Duis feugiat feugiat libero bibendum consectetur. Ut in felis non nisl egestas lacinia. Fusce interdum vitae nunc eget elementum. Quisque dignissim luctus magna et elementum. Cum sociis natoque penatibus et magnis dis parturient montes, nascetur ridiculus mus. Sed nunc lorem, convallis consequat fermentum eget, aliquet sit amet libero.</p>
</div> 這條規則得到了很好的支持,儘管它仍然需要前綴。在其他一些列相關規則的支持以及瀏覽器在處理極端情況方面的差異的支持下,事情出現了問題。
12. CSS 3D 變換
沒有什麼比令人印象深刻的 3D CSS 演示更華而不實、令人眼花繚亂的了。儘管它在演示或作品集網站之外的實用性值得懷疑,但 3D CSS 為設計人員和開發人員提供了一些強大的功能,如果做得好,這些功能可以贏得用戶的心。
點擊 Edit 瀏覽以下示例的源代碼 按鈕,看看它是如何製作的。
.container{

    /* How pronounced should the 3D effects be */
    perspective: 800px;
    -webkit-perspective: 800px;

    background: radial-gradient(#e0e0e0, #aaa);
    width:480px;
    height:480px;
    margin:0 auto;
    border-radius:6px;
    position:relative;
}

.iphone-front,
.iphone-back{

    /* Enable 3D transforms */
    transform-style: preserve-3d;
    -webkit-transform-style: preserve-3d;

    /* We are using two separate divs for the front and back of the
       phone. This will hide the divs when they are flipped, so that the
       opposite side can be seen:  */

    backface-visibility: hidden;
    -webkit-backface-visibility: hidden;

    width:200px;
    height:333px;

    position:absolute;
    top:50%;
    left:50%;
    margin:-166px 0 0 -100px;

    background:url(https://demo.tutorialzine.com/2013/10/css3-features-you-can-finally-use/assets/img/iphone.png) no-repeat left center;

    /* Animate the transitions */
    transition:0.8s;
}

.iphone-back{

    /* The back side is flipped 180 deg by default */
    transform:rotateY(180deg);
    -webkit-transform:rotateY(180deg);

    background-position:right center;
}

.container:hover .iphone-front{
    /* When the container is hovered, flip the front side and hide it .. */
    transform:rotateY(180deg);
    -webkit-transform:rotateY(180deg);
}

.container:hover .iphone-back{
    /* .. at the same time flip the back side into visibility */
    transform:rotateY(360deg);
    -webkit-transform:rotateY(360deg);
}
<div class="container">
<div class="iphone-front"></div>
<div class="iphone-back"></div>
</div> 這段代碼模仿了我們的類似 Apple 的登錄表單教程,我建議你閱讀。如果您想了解更多有關 3D CSS 的信息,請查看此詳細介紹。如果不需要針對老IE,瀏覽器支持也很好。
其他值得提及
還有其他值得注意的功能值得一提。如果你還沒有,你應該停止使用 border-radius 的前綴 和 box-shadow .您現在也可以使用 data-uri 作為每個瀏覽器中的背景圖像。 opacity 到處都支持,還有非常有用的background-size 屬性。
flexbox 的跨瀏覽器支持還有一段時間 、code>@supports、filters 和 CSS masks ,但我相信等待是值得的!