FrameWarp - jQuery 插件,用於在整潔的疊加層中顯示頁面
在開發一個令人興奮的新 Web 應用程序時,我發現我需要一種在覆蓋窗口中顯示某些頁面的方法。如果您想在應用程序的不同屏幕中重用共享或設置頁面等內容,這會很方便。與其拼湊一些勉強完成的工作,我決定花時間,把它做好並與你分享。
當然,可以選擇使用眾多燈箱插件中的一個來執行此操作,但我們將在本教程中創建的插件比通用燈箱腳本有很多優勢:
- 輕量級 - 專為顯示頁面而非圖像而創建;
- 沒有 UI,所以頁面感覺就像一個對話窗口;
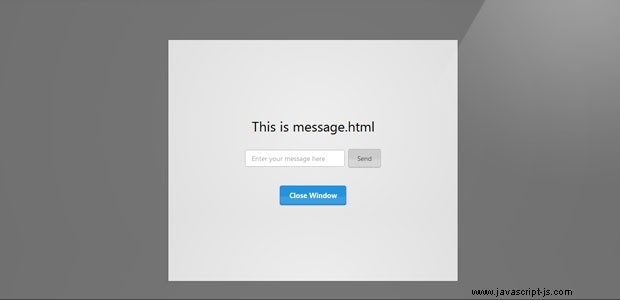
- 頁面可以自行關閉,也可以向父窗口發送消息;
- 可以選擇使用緩存來加快後續頁面加載速度;
- 使用帶有 JavaScript 後備的簡潔 CSS 動畫。
偉大的!現在讓我們開始吧。
理念
當點擊鏈接或按鈕時,我們的名為 FrameWarp 的插件將檢測該元素的坐標,並觸發一個擴展多邊形移動到窗口中心的 CSS 動畫。然後插件將加載一個指向我們要顯示的 URL 的 iframe。如果頁面與當前站點來自同一來源,FrameWarp 還將向 iframe 添加兩個有用的方法 - 一個用於隱藏它,另一個用於向父級發送消息。
我們將使用用於 jQuery 的 jQuery++ 工具集,它將庫的 animate() 方法轉換為在支持它們的瀏覽器上使用 CSS3 過渡。這使得構建複雜的 CSS 動畫變得非常容易。
動畫
正如他們所說,小提琴值 1000 字。所以這裡是動畫(點擊 Result 標籤):
這裡的技巧是,我們為元素的邊框屬性和寬度設置動畫,而高度保持為 0。左右邊框在插件的 CSS 中設置為透明。或者,您可以使用 3D CSS 轉換來實現,但在舊版瀏覽器中無法使用。
插件
現在寫插件。我們將把我們的代碼包裝在一個匿名函數中,以便它與頁面的其餘部分隔離。實際上,您可以在下面看到的所有變量和輔助函數都是私有的,並且只能由我們的插件訪問。
assets/framewarp/framewarp.js
(function($){

    // Private varialble deffinitions

    var body = $('body'),
        win = $(window),
        popup, popupBG;

    var frameCache = {};
    var frameCacheDiv = $('<div class="frameCacheDiv">').appendTo('body');
    var currentIframe;

    $.fn.frameWarp = function(settings){

        // The main code of the plugin will go here

    };

    // Helper Functions

    function hide(){

        // Here we will remove the popup and dark background from the page

    }

    function setUpAPI(iframe, settings){

        // In this function, we will make two API methods available to the frame,
        // if it the page is from the same domain.
    }

    function sameOrigin(url){

        // Here we will determine whether the page is from the same domain
    }

    function getOrigin(url){

        // A helper function for generating an origin string
        // of the type: https://www.google.com
        // This includes the protocol and host.
    }

})(jQuery);
該插件創建一個帶有 frameCacheDiv 類名的 div。它將保存我們添加到頁面的 iframe。插件向頁面添加了另外兩個 div - .popup 和 .popupBG,我們稍後會討論。現在讓我們檢查一下輔助函數。
function hide(){

    if(currentIframe){
        currentIframe.hide();
        currentIframe = null;
    }

    popupBG.remove();
    popup.remove();
}

function setUpAPI(iframe, settings){

    if(sameOrigin(settings.url)){

        // Exposing a minimal API to the iframe
        iframe[0].contentWindow.frameWarp = {
            hide: hide,
            sendMessage:function(param){
                return settings.onMessage(param);
            }
        };
    }
}

function sameOrigin(url){

    // Compare whether the url belongs to the
    // local site or is remote

    return (getOrigin(url) == getOrigin(location.href));
}

function getOrigin(url){

    // Using an anchor element to
    // parse the URL

    var a = document.createElement('a');
    a.href = url;

    return a.protocol+'//'+a.hostname;
}
瀏覽器實現了一種稱為“同源策略”的安全功能,它限制一個網站訪問另一個網站的 DOM。為此,我們有一個輔助函數,用於將 iframe 的 URL 與當前頁面的地址進行比較。只有當域和協議都匹配時,插件才會嘗試訪問 iframe 的 DOM 並添加發送消息和隱藏的 API 方法。
現在我們準備好編寫實際的 frameWarp 插件了!
$.fn.frameWarp = function(settings){

    // Supplying default settings

    settings = $.extend({
        cache: true,
        url: '',
        width:600,
        height:500,
        closeOnBackgroundClick: true,
        onMessage:function(){},
        onShow:function(){}
    }, settings);

    this.on('click',function(e){

        e.preventDefault();

        var elem = $(this),
            offset = elem.offset();

        // The center of the button
        var buttonCenter = {
            x: offset.left - win.scrollLeft() + elem.outerWidth()/2,
            y: offset.top - win.scrollTop() + elem.outerHeight()/2
        };

        // The center of the window
        var windowCenter = {
            x: win.width()/2,
            y: win.height()/2
        };

        // If no URL is specified, use the href attribute.
        // This is useful for progressively enhancing links.

        if(!settings.url && elem.attr('href')){
            settings.url = elem.attr('href');
        }

        // The dark background

        popupBG = $('<div>',{'class':'popupBG'}).appendTo(body);

        popupBG.click(function(){

            if(settings.closeOnBackgroundClick){
                hide();
            }

        }).animate({    // jQuery++ CSS3 animation
            'opacity':1
        },400);

        // The popup

        popup = $('<div>').addClass('popup').css({
            width   : 0,
            height  : 0,
            top     : buttonCenter.y,
            left    : buttonCenter.x - 35
        });

        // Append it to the page, and trigger a CSS3 animation
        popup.appendTo(body).animate({
            'width'                 : settings.width,
            'top'                   : windowCenter.y - settings.height/2,
            'left'                  : windowCenter.x - settings.width/2,
            'border-top-width'      : settings.height,
            'border-right-width'    : 0,
            'border-left-width'     : 0
        },200,function(){

            popup.addClass('loading').css({
                'width': settings.width,
                'height': settings.height
            });

            var iframe;

            // If this iframe already exists in the cache
            if(settings.cache && settings.url in frameCache){
                iframe = frameCache[settings.url].show();
            }
            else{

                iframe = $('<iframe>',{
                    'src' : settings.url,
                    'css' : {
                        'width' : settings.width,
                        'height' : settings.height,
                    }
                });

                // If the cache is enabled, add the frame to it
                if(settings.cache){
                    frameCache[settings.url] = iframe;
                    iframe.data('cached',true);
                    settings.onShow();
                }
                else{

                    // remove non-cached iframes
                    frameCacheDiv.find('iframe').each(function(){
                        var f = $(this);
                        if(!f.data('cached')){
                            f.remove();
                        }
                    });
                }

                iframe.ready(function(){
                    frameCacheDiv.append(iframe);
                    setUpAPI(iframe, settings);
                    settings.onShow();
                });
            }

            currentIframe = iframe;

        });

    });

    return this;
};
正如我在開頭部分提到的,我們正在使用 jQuery++ 來增強 jQuery 的 animate() 函數以支持 CSS3 動畫。這樣我們就不必編寫大量的 CSS,而且我們還實現了完全的向後兼容性,因為如果瀏覽器不支持 CSS 動畫,新的 animate() 方法將回退到舊的方法。
第一個動畫完成後,我們將加載類添加到 .popup div。新類為彈出窗口添加了一個動畫預加載器 gif 和一個軟框陰影,您可以通過檢查 assets/framewarp/framewarp.css 看到 .
使用插件
要使用該插件,請包含 assets/framewarp/framewarp.css 到頁面的頂部,以及 assets/framewarp/framewarp.js 在您的 jQuery 庫副本之後。
在此之後,剩下的就是初始化插件。例如,下面是驅動我們演示頁面的代碼:
assets/js/script.s
$(function(){

    // If no url property is passed, the
    // href attribute will be used

    $('#b1').frameWarp();

    $('#b2').frameWarp({
        onMessage: function(msg){
            $('#messages').append('Message Received: '+ msg+'
');
        }
    });

    // Cache is enabled by default
    $('#b3').frameWarp({
        url : 'http://www.cnn.com/'
    });

    // Disable caching
    $('#b4').frameWarp({
        url : 'http://www.cnn.com/',
        cache:false
    });
});
完成!
有了這個插件就完成了!您可以使用它來增強您的 Web 應用程序並重用其中的某些部分,而無需編寫額外的代碼。我很想在下面的評論部分聽到您的建議或想法。