帶有 jQuery 和 Canvas 的快門效果組合
在今天的教程中,我們將使用 HTML5 畫布元素創建一個簡單的攝影作品集,其中顯示一組帶有相機快門效果的精選照片。此功能將以易於使用的 jQuery 插件的形式出現,您可以輕鬆地將其整合到任何網站中。
理念
畫布元素是一個特殊區域,您可以在其中使用 JavaScript 進行繪製並對圖像進行各種操作。但是,可以用它做什麼是有限制的。生成複雜的實時動畫具有挑戰性,因為您必須在每一幀上重新繪製畫布。
這需要網絡瀏覽器目前無法提供的大量處理能力,因此流暢的動畫幾乎是不可能的。但是有一種方法可以繞過這個限制。如果你玩過這個演示,你會注意到它運行得多麼流暢。這是因為幀是提前生成的,並且每個幀都是作為單獨的畫布元素構建的。
在頁面初始加載後(生成框架時),插件的工作就變成了簡單地在框架中循環。

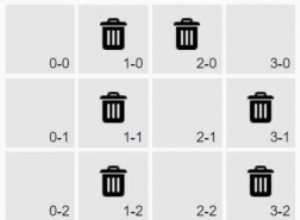
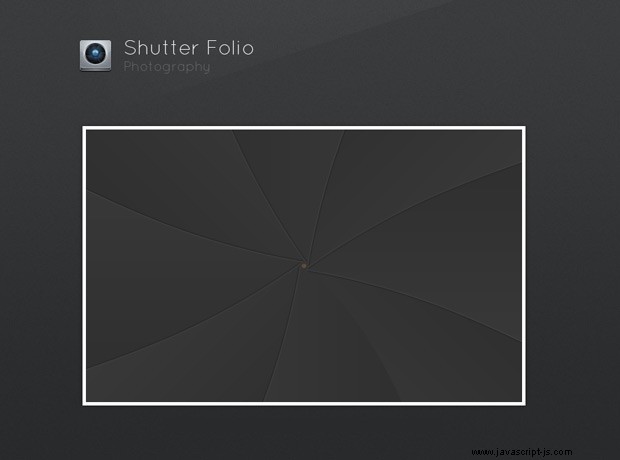
快門本身是通過繪製相同的略微彎曲的三角形圖像生成的。對於每一幀,開口都會變小,直到和平結合在一起。
HTML
首先讓我們仔細看看頁面的 HTML 標記。由於我們使用的是 canvas 元素,我們需要將文檔定義為 HTML5 並具有適當的 doctype。
index.html
<!DOCTYPE html> <!-- Defining the document as HTML5 -->
<html>
<head>
<meta http-equiv="Content-Type" content="text/html; charset=utf-8" />
<title>"Shutter Effect" with Canvas and jQuery | Tutorialzine Demo</title>
<link rel="stylesheet" type="text/css" href="assets/css/styles.css" />
<link rel="stylesheet" type="text/css" href="assets/jquery.shutter/jquery.shutter.css" />
</head>
<body>
<div id="top"></div>
<div id="page">
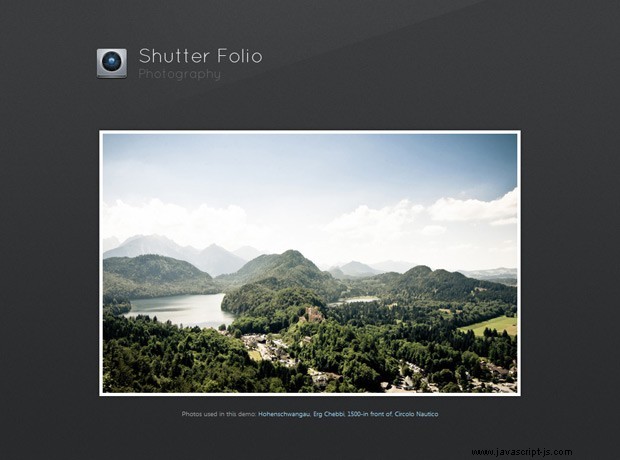
<h1>Shutter Folio Photography</h1>
<div id="container">
<ul>
<li><img src="assets/img/photos/1.jpg" width="640" height="400" /></li>
<li><img src="assets/img/photos/2.jpg" width="640" height="400" /></li>
<li><img src="assets/img/photos/3.jpg" width="640" height="400" /></li>
<li><img src="assets/img/photos/4.jpg" width="640" height="400" /></li>
</ul>
</div>
</div>
<script src="http://ajax.googleapis.com/ajax/libs/jquery/1.5.0/jquery.min.js"></script>
<script src="assets/jquery.shutter/jquery.shutter.js"></script>
<script src="assets/js/script.js"></script>
</body>
</html> 頁面和插件的樣式表包含在 head 部分中,腳本文件就在結束 body 標記之前。 #content div 包含一個包含四張照片的無序列表,這些照片將顯示為幻燈片。如果用戶的瀏覽器不支持canvas元素,我們只會循環瀏覽這些圖片而不顯示快門效果。
調用快門插件時,它會生成以下 HTML 標記。在我們的示例中,我們在 #content 上調用它 div,所以下面的代碼被附加到它上面。
生成的 HTML
<div class="shutterAnimationHolder" style="width: 640px; height: 400px;">
  <div class="film"
  style="height: 15000px; width: 1000px; margin-left: -500px; top: -300px;">

    <canvas width="1000" height="1000"></canvas>
    <canvas width="1000" height="1000"></canvas>
    <canvas width="1000" height="1000"></canvas>
    <canvas width="1000" height="1000"></canvas>
    <canvas width="1000" height="1000"></canvas>
    <canvas width="1000" height="1000"></canvas>
    <canvas width="1000" height="1000"></canvas>
    <canvas width="1000" height="1000"></canvas>
    <canvas width="1000" height="1000"></canvas>
    <canvas width="1000" height="1000"></canvas>
    <canvas width="1000" height="1000"></canvas>
    <canvas width="1000" height="1000"></canvas>
    <canvas width="1000" height="1000"></canvas>
    <canvas width="1000" height="1000"></canvas>
    <canvas width="1000" height="1000"></canvas>
  </div>
</div>
每個畫布元素都保存一幀快門動畫。 .film 的高度 div 設置得足夠大,可以一個一個地顯示畫布元素。通過動畫電影的 top 屬性,我們可以跳過幀並創建動畫。
.shutterAnimationHolder div 設置為與插入它的容器相同的高度,並顯示在帶有照片的無序列表上。 溢出:隱藏 它隱藏了電影的其餘部分,一次只顯示一幀。您可以將畫布元素視為常規 PNG,因此它們支持完全透明並在其下方顯示照片。
我們將在本教程的 jQuery 步驟中回到這一點。
CSS
為演示提供支持的 CSS 非常簡單,因為大部分工作都是通過生成畫布圖像來完成的。但是,它們仍然必須組織成電影並適當地製作動畫,以實現流暢的動畫效果。
jquery.shutter.css
.shutterAnimationHolder .film canvas{
    display: block;
    margin: 0 auto;
}

.shutterAnimationHolder .film{
    position:absolute;
    left:50%;
    top:0;
}

.shutterAnimationHolder{
    position:absolute;
    overflow:hidden;
    top:0;
    left:0;
    z-index:1000;
}
這三組規則以 .shutterAnimationHolder 為前綴 類,所以樣式只影響插件生成的標記。如果您正在優化,您可以選擇將此代碼複製到您的主樣式表中,以盡量減少 HTTP 請求的數量。
jQuery
這是本教程中最有趣的部分。這裡我們將創建一個 jQuery 插件 - tzShutter - 易於使用,只需對您的網站進行最少的修改即可使用。
這個插件開發的一個重要方面是為瀏覽器不理解canvas標籤的用戶提供適當的支持(基本上除了9之外的所有IE版本)。這可以通過在這種情況下跳過畫布生成來輕鬆完成。
我們還必須為 tzShutter 的用戶提供一種觸發打開和關閉動畫的方法。我們將通過將兩個自定義事件綁定到包含元素來實現這一點 - shutterOpen 和 快門關閉 , 都可以通過 trigger() 輕鬆執行 jQuery方法。
此外,該插件將為用戶提供一種通過回調函數、作為參數傳遞的方式插入自定義功能的方法。這些在動畫過程的關鍵部分執行 - 當畫布元素生成時,以及快門打開或關閉時。
您可以在下面看到插件的代碼。
jquery.shutter.js
(function(){

    // Creating a regular jQuery plugin:

    $.fn.tzShutter = function(options){

        // Checking for canvas support. Works in all modern browsers:
        var supportsCanvas = 'getContext' in document.createElement('canvas');

        // Providing default values:

        options = $.extend({
            openCallback:function(){},
            closeCallback:function(){},
            loadCompleteCallback:function(){},
            hideWhenOpened:true,
            imgSrc: 'jquery.shutter/shutter.png'
        },options);

        var element = this;

        if(!supportsCanvas){

            // If there is no support for canvas, bind the
            // callack functions straight away and exit:

            element.bind('shutterOpen',options.openCallback)
                   .bind('shutterClose',options.closeCallback);

            options.loadCompleteCallback();

            return element;
        }

        window.setTimeout(function(){

            var frames = {num:15, height:1000, width:1000},
                slices = {num:8, width: 416, height:500, startDeg:30},
                animation = {
                    width : element.width(),
                    height : element.height(),
                    offsetTop: (frames.height-element.height())/2
                },

                // This will calculate the rotate difference between the
                // slices of the shutter. (2*Math.PI equals 360 degrees in radians):

                rotateStep = 2*Math.PI/slices.num,
                rotateDeg = 30;

            // Calculating the offset
            slices.angleStep = ((90 - slices.startDeg)/frames.num)*Math.PI/180;

            // The shutter slice image:
            var img = new Image();

            // Defining the callback before setting the source of the image:
            img.onload = function(){

                window.console && console.time && console.time("Generating Frames");

                // The film div holds 15 canvas elements (or frames).

                var film = $('<div>',{
                    className: 'film',
                    css:{
                        height: frames.num*frames.height,
                        width: frames.width,
                        marginLeft: -frames.width/2, // Centering horizontally
                        top: -animation.offsetTop
                    }
                });

                // The animation holder hides the film with overflow:hidden,
                // exposing only one frame at a time.

                var animationHolder = $('<div>',{
                    className: 'shutterAnimationHolder',
                    css:{
                        width:animation.width,
                        height:animation.height
                    }
                });

                for(var z=0;z<frames.num;z++){

                    // Creating 15 canvas elements.

                    var canvas  = document.createElement('canvas'),
                        c       = canvas.getContext("2d");

                    canvas.width=frames.width;
                    canvas.height=frames.height;

                    c.translate(frames.width/2,frames.height/2);

                    for(var i=0;i<slices.num;i++){

                        // For each canvas, generate the different
                        // states of the shutter by drawing the shutter
                        // slices with a different rotation difference.

                        // Rotating the canvas with the step, so we can
                        // paint the different slices of the shutter.
                        c.rotate(-rotateStep);

                        // Saving the current rotation settings, so we can easily revert
                        // back to them after applying an additional rotation to the slice.

                        c.save();

                        // Moving the origin point (around which we are rotating
                        // the canvas) to the bottom-center of the shutter slice.
                        c.translate(0,frames.height/2);

                        // This rotation determines how widely the shutter is opened.
                        c.rotate((frames.num-1-z)*slices.angleStep);

                        // An additional offset, applied to the last five frames,
                        // so we get a smoother animation:

                        var offset = 0;
                        if((frames.num-1-z) <5){
                            offset = (frames.num-1-z)*5;
                        }

                        // Drawing the shutter image
                        c.drawImage(img,-slices.width/2,-(frames.height/2 + offset));

                        // Reverting back to the saved settings above.
                        c.restore();
                    }

                    // Adding the canvas (or frame) to the film div.
                    film.append(canvas);
                }

                // Appending the film to the animation holder.
                animationHolder.append(film);

                if(options.hideWhenOpened){
                    animationHolder.hide();
                }

                element.css('position','relative').append(animationHolder);

                var animating = false;

                // Binding custom open and close events, which trigger
                // the shutter animations.

                element.bind('shutterClose',function(){

                    if(animating) return false;
                    animating = true;

                    var count = 0;

                    var close = function(){

                        (function animate(){
                            if(count>=frames.num){
                                animating=false;

                                // Calling the user provided callback.
                                options.closeCallback.call(element);

                                return false;
                            }

                            film.css('top',-frames.height*count - animation.offsetTop);
                            count++;
                            setTimeout(animate,20);
                        })();
                    }

                    if(options.hideWhenOpened){
                        animationHolder.fadeIn(60,close);
                    }
                    else close();
                });

                element.bind('shutterOpen',function(){

                    if(animating) return false;
                    animating = true;

                    var count = frames.num-1;

                    (function animate(){
                        if(count<0){

                            var hide = function(){
                                animating=false;
                                // Calling the user supplied callback:
                                options.openCallback.call(element);
                            };

                            if(options.hideWhenOpened){
                                animationHolder.fadeOut(60,hide);
                            }
                            else{
                                hide();
                            }

                            return false;
                        }

                        film.css('top',-frames.height*count - animation.offsetTop);
                        count--;

                        setTimeout(animate,20);
                    })();
                });

                // Writing the timing information if the
                // firebug/web development console is opened:

                window.console && console.timeEnd && console.timeEnd("Generating Frames");
                options.loadCompleteCallback();
            };

            img.src = options.imgSrc;

        },0);

        return element;
    };

})(jQuery);
這種方法的唯一缺點是,生成畫布元素的處理器密集型任務是在頁面加載時完成的。這可能會導致瀏覽器界面在短時間內變得無響應。您也可以改用實際的 PNG 圖像,但這會為您的頁面增加超過 1mb 的重量(與現在的 12 kb 相比)。
現在讓我們看看插件是如何使用的。
script.js
$(document).ready(function(){

    var container = $('#container'),
        li = container.find('li');

    // Using the tzShutter plugin. We are giving the path
    // to he shutter.png image (located in the plugin folder), and two
    // callback functions.

    container.tzShutter({
        imgSrc: 'assets/jquery.shutter/shutter.png',
        closeCallback: function(){

            // Cycling the visibility of the li items to
            // create a simple slideshow.

            li.filter(':visible:first').hide();

            if(li.filter(':visible').length == 0){
                li.show();
            }

            // Scheduling a shutter open in 0.1 seconds:
            setTimeout(function(){container.trigger('shutterOpen')},100);
        },
        loadCompleteCallback:function(){
            setInterval(function(){
                container.trigger('shutterClose');
            },4000);

            container.trigger('shutterClose');
        }
    });

});
當插件完成生成畫布元素時,它會觸發 loadCompleteCallback 函數。我們用它來安排每四秒一次的快門動畫,伴隨著無序列表中可見照片的變化。
這樣我們的快門效果插件就完成了!
結論
canvas 標籤為開發人員提供了廣泛的可能性,並允許他們創建新的、令人興奮的用戶界面、動畫甚至遊戲。在下面的評論部分分享您的想法。如果您喜歡本教程,請務必訂閱我們的 RSS 提要並在 twitter 上關注我們。