使用 jQuery 上傳 HTML5 文件
今天我們將開發一個名為上傳中心的小型網絡應用程序 ,這將允許人們通過將照片拖放到瀏覽器窗口中來從他們的計算機上傳照片,這可以通過現代瀏覽器公開的新 HTML5 API 實現。
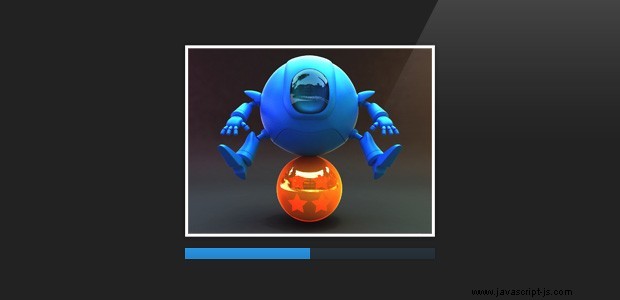
照片將具有預覽和進度條,所有這些都在客戶端進行控制。目前,照片僅存儲在服務器上的一個文件夾中,但您可以根據自己的喜好進行改進。
什麼是 HTML5 文件上傳?
使用 HTML5 上傳文件實際上是三種技術的結合——新的文件閱讀器 API、新的拖放 API 和優秀的 AJAX(添加了二進制數據傳輸)。下面是一個HTML5文件上傳過程的描述:
- 用戶通過拖動將一個或多個文件從其文件系統拖放到瀏覽器窗口。支持 Drag &Drop API 的瀏覽器 將觸發一個事件,該事件與其他有用信息一起包含已刪除文件的列表;
- 使用文件閱讀器 API ,我們將列表中的文件作為二進制數據讀取,並存儲在內存中;
- 我們使用新的 sendAsBinary XMLHttpRequest 的方法 對象,並將文件數據發送到服務器。
聽起來很複雜?是的,它可以使用一些優化。幸運的是,有 jQuery 插件可以為我們做到這一點。其中之一是 Filedrop,它是該功能的包裝器,並提供限制最大文件大小和指定回調函數的功能,這對於將其集成到您的 Web 應用程序中非常方便。
目前文件上傳僅在 Firefox 和 Chrome 中工作 ,但其他瀏覽器即將推出的主要版本也包括對它的支持。對於舊版瀏覽器,一個簡單的備用解決方案是顯示常規文件輸入對話框,但我們今天不會這樣做,因為我們將把注意力集中在使用 HTML5 上。
讓我們開始吧!
HTML
我們上傳中心的標記 再簡單不過了。我們有一個常規的 HTML5 文檔,其中包括我們的樣式表和 script.js 文件,Filedrop 插件 和 jQuery 庫 .
index.html
<!DOCTYPE html>
<html>
    <head>
        <meta charset="utf-8" />
        <title>HTML5 File Drag and Drop Upload with jQuery and PHP | Tutorialzine Demo</title>

        <!-- Our CSS stylesheet file -->
        <link rel="stylesheet" href="assets/css/styles.css" />

        <!--[if lt IE 9]>
          <script src="http://html5shiv.googlecode.com/svn/trunk/html5.js"></script>
        <![endif]-->
    </head>

    <body>

        <header>
            <h1>HTML5 File Upload with jQuery and PHP</h1>
        </header>

        <div id="dropbox">
            <span class="message">Drop images here to upload. <br /><i>(they will only be visible to you)</i></span>
        </div>

        <!-- Including The jQuery Library -->
        <script src="http://code.jquery.com/jquery-1.6.3.min.js"></script>

        <!-- Including the HTML5 Uploader plugin -->
        <script src="assets/js/jquery.filedrop.js"></script>

        <!-- The main script file -->
        <script src="assets/js/script.js"></script>

    </body>
</html>
Filedrop 與之交互的唯一 div 是 #dropbox .我們將此元素傳遞給插件,插件將檢測何時將文件放在其上。如果出現錯誤情況(例如,如果您的瀏覽器不支持本示例所依賴的 HTML5 API 之一),則消息範圍會更新。
稍後,當我們拖放文件時,我們的 jQuery 代碼將通過向頁面添加以下標記來顯示預覽:
<div class="preview done">
<span class="imageHolder">
<img src="" />
<span class="uploaded"></span>
</span>
<div class="progressHolder">
<div class="progress"></div>
</div>
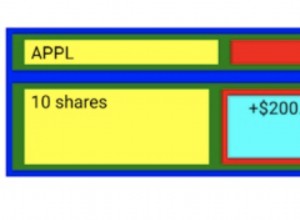
</div> 此片段包含圖像的預覽(源屬性將使用圖片的 DataURL 填充)和進度條。整個預覽可以有 ".done" 類,這會導致 ".uploaded" span 顯示(默認隱藏)。此 span 的背景為綠色複選標記,表示上傳完成。
太好了,讓我們繼續我們的 script.js 文件!
jQuery 代碼
由於所有實際的文件傳輸功能都由 Filedrop 插件處理,我們只需要調用它並傳遞一些回調,因此我們可以將它掛接到我們的上傳中心 .我們將在下一節編寫一個小的 PHP 腳本來處理服務器上的上傳。
第一步是編寫一個輔助函數,它接受一個文件對象(一個由網絡瀏覽器在文件放置時創建的特殊對象,具有文件名、路徑和大小等屬性),並創建用於預覽上傳的標記。
assets/js/script.js
var template = '<div class="preview">'+
                        '<span class="imageHolder">'+
                            '<img />'+
                            '<span class="uploaded"></span>'+
                        '</span>'+
                        '<div class="progressHolder">'+
                            '<div class="progress"></div>'+
                        '</div>'+
                    '</div>';

    function createImage(file){

        var preview = $(template),
            image = $('img', preview);

        var reader = new FileReader();

        image.width = 100;
        image.height = 100;

        reader.onload = function(e){

            // e.target.result holds the DataURL which
            // can be used as a source of the image:

            image.attr('src',e.target.result);
        };

        // Reading the file as a DataURL. When finished,
        // this will trigger the onload function above:
        reader.readAsDataURL(file);

        message.hide();
        preview.appendTo(dropbox);

        // Associating a preview container
        // with the file, using jQuery's $.data():

        $.data(file,preview);
    }
模板 變量保存預覽的 HTML5 標記。我們獲取圖像的 DataURL(圖像字節的 base64 編碼表示)並將其添加為圖像的源。然後將所有內容附加到保管箱容器中。現在我們只剩下調用 filedrop 插件了:
assets/js/script.js
$(function(){

    var dropbox = $('#dropbox'),
        message = $('.message', dropbox);

    dropbox.filedrop({
        // The name of the $_FILES entry:
        paramname:'pic',

        maxfiles: 5,
        maxfilesize: 2, // in mb
        url: 'post_file.php',

        uploadFinished:function(i,file,response){
            $.data(file).addClass('done');
            // response is the JSON object that post_file.php returns
        },

        error: function(err, file) {
            switch(err) {
                case 'BrowserNotSupported':
                    showMessage('Your browser does not support HTML5 file uploads!');
                    break;
                case 'TooManyFiles':
                    alert('Too many files! Please select 5 at most!');
                    break;
                case 'FileTooLarge':
                    alert(file.name+' is too large! Please upload files up to 2mb.');
                    break;
                default:
                    break;
            }
        },

        // Called before each upload is started
        beforeEach: function(file){
            if(!file.type.match(/^image\//)){
                alert('Only images are allowed!');

                // Returning false will cause the
                // file to be rejected
                return false;
            }
        },

        uploadStarted:function(i, file, len){
            createImage(file);
        },

        progressUpdated: function(i, file, progress) {
            $.data(file).find('.progress').width(progress);
        }

    });

    var template = '...';

    function createImage(file){
        // ... see above ...
    }

    function showMessage(msg){
        message.html(msg);
    }

}); 這樣,#dropbox 上的每個有效圖像文件 div 被上傳到 post_file.php ,您可以在下一節中看到。

PHP 代碼
在 PHP 方面,常規的表單文件上傳和拖放沒有區別。這意味著您可以輕鬆地為您的應用程序提供回退解決方案並重用相同的後端。
post_file.php
// If you want to ignore the uploaded files,
// set $demo_mode to true;

$demo_mode = false;
$upload_dir = 'uploads/';
$allowed_ext = array('jpg','jpeg','png','gif');

if(strtolower($_SERVER['REQUEST_METHOD']) != 'post'){
    exit_status('Error! Wrong HTTP method!');
}

if(array_key_exists('pic',$_FILES) && $_FILES['pic']['error'] == 0 ){

    $pic = $_FILES['pic'];

    if(!in_array(get_extension($pic['name']),$allowed_ext)){
        exit_status('Only '.implode(',',$allowed_ext).' files are allowed!');
    }

    if($demo_mode){

        // File uploads are ignored. We only log them.

        $line = implode('       ', array( date('r'), $_SERVER['REMOTE_ADDR'], $pic['size'], $pic['name']));
        file_put_contents('log.txt', $line.PHP_EOL, FILE_APPEND);

        exit_status('Uploads are ignored in demo mode.');
    }

    // Move the uploaded file from the temporary
    // directory to the uploads folder:

    if(move_uploaded_file($pic['tmp_name'], $upload_dir.$pic['name'])){
        exit_status('File was uploaded successfuly!');
    }

}

exit_status('Something went wrong with your upload!');

// Helper functions

function exit_status($str){
    echo json_encode(array('status'=>$str));
    exit;
}

function get_extension($file_name){
    $ext = explode('.', $file_name);
    $ext = array_pop($ext);
    return strtolower($ext);
}
該腳本對用於請求頁面的 HTTP 方法和文件擴展名的有效性運行一些檢查。演示模式主要針對 demo.tutorialzine.com ,我不想存儲任何文件上傳(如果你不調用 move_uploaded_file 在您的腳本中,該文件會在請求結束時自動刪除)。
現在讓我們把它變得漂亮!
CSS 樣式
我省略了與上傳不直接相關的樣式表部分。您可以在 styles.css 中查看所有內容 .
assets/css/styles.css
/*-------------------------
    Dropbox Element
--------------------------*/

#dropbox{
    background:url('../img/background_tile_3.jpg');

    border-radius:3px;
    position: relative;
    margin:80px auto 90px;
    min-height: 290px;
    overflow: hidden;
    padding-bottom: 40px;
    width: 990px;

    box-shadow:0 0 4px rgba(0,0,0,0.3) inset,0 -3px 2px rgba(0,0,0,0.1);
}

#dropbox .message{
    font-size: 11px;
    text-align: center;
    padding-top:160px;
    display: block;
}

#dropbox .message i{
    color:#ccc;
    font-size:10px;
}

#dropbox:before{
    border-radius:3px 3px 0 0;
}

/*-------------------------
    Image Previews
--------------------------*/

#dropbox .preview{
    width:245px;
    height: 215px;
    float:left;
    margin: 55px 0 0 60px;
    position: relative;
    text-align: center;
}

#dropbox .preview img{
    max-width: 240px;
    max-height:180px;
    border:3px solid #fff;
    display: block;

    box-shadow:0 0 2px #000;
}

#dropbox .imageHolder{
    display: inline-block;
    position:relative;
}

#dropbox .uploaded{
    position: absolute;
    top:0;
    left:0;
    height:100%;
    width:100%;
    background: url('../img/done.png') no-repeat center center rgba(255,255,255,0.5);
    display: none;
}

#dropbox .preview.done .uploaded{
    display: block;
}

/*-------------------------
    Progress Bars
--------------------------*/

#dropbox .progressHolder{
    position: absolute;
    background-color:#252f38;
    height:12px;
    width:100%;
    left:0;
    bottom: 0;

    box-shadow:0 0 2px #000;
}

#dropbox .progress{
    background-color:#2586d0;
    position: absolute;
    height:100%;
    left:0;
    width:0;

    box-shadow: 0 0 1px rgba(255, 255, 255, 0.4) inset;

    -moz-transition:0.25s;
    -webkit-transition:0.25s;
    -o-transition:0.25s;
    transition:0.25s;
}

#dropbox .preview.done .progress{
    width:100% !important;
}
.progress div 絕對定位。改變它的寬度(以百分比為單位)是一個自然的進度指示器。加入 0.25 的過渡,你就有了動畫增量,單獨使用 jQuery 會有點棘手。
這樣我們的 HTML5 上傳中心就完成了!
我們完成了!
您可以將其用作文件上傳服務、HTML5 圖庫、文件管理器或應用程序的新管理面板的起點。在評論中添加您的想法或建議。