製作 Apple 風格的啟動畫面
披頭士樂隊在 iTunes 上!或者,如果你和我一樣,不太在意它,你可能已經註意到 Apple 用來宣傳活動的令人敬畏的啟動畫面。冒著引領潮流的風險,在本教程中,我們將創建一個簡單的 jQuery 插件,它會為我們顯示精美的 Apple 風格的閃屏。
HTML
將閃屏功能封裝到一個 jQuery 插件中,使其可移植且易於整合到現有網站中。但在開始處理插件文件之前,我們首先需要設置一個簡單演示頁面的 HTML 標記,該頁面將使用該插件。
index.html
<!DOCTYPE html>
<html>
<head>
<meta http-equiv="Content-Type" content="text/html; charset=utf-8" />
<title>Apple-style Splash Screen | Tutorialzine Demo</title>

<link rel="stylesheet" type="text/css" href="css/styles.css" />
<link rel="stylesheet" type="text/css" href="css/splashscreen.css" />

<script src="http://ajax.microsoft.com/ajax/jQuery/jquery-1.4.4.min.js"></script>
<script src="js/jquery.splashscreen.js"></script>
<script src="js/script.js"></script>

</head>
<body>

<div id="page">
    <div id="topBar"></div>

    <div id="promoIMG">
        <img src="img/available_now.png" alt="Available Now" />
    </div>

    <div id="contentArea">
        <p>... The textual content ...</p>
    </div>
</div>

</body>
</html>
請注意,我已將腳本標籤放在 head 部分。通常最好將它們包含在正文中,在所有其他內容之後,否則在下載 js 文件時頁面渲染會阻塞,我們的訪問者會盯著空白屏幕。然而,這一次,這是一個必要的壞事,因為我們需要確保在顯示啟動屏幕之前頁面不會向用戶顯示任何內容。
閃屏插件的代碼包含在 jquery.splashscreen.js ,我們將在最後一節中討論。該插件依賴於 splashcreen.css ,它定義了一些有用的樣式。您可以在教程的下一部分中查看樣式表。
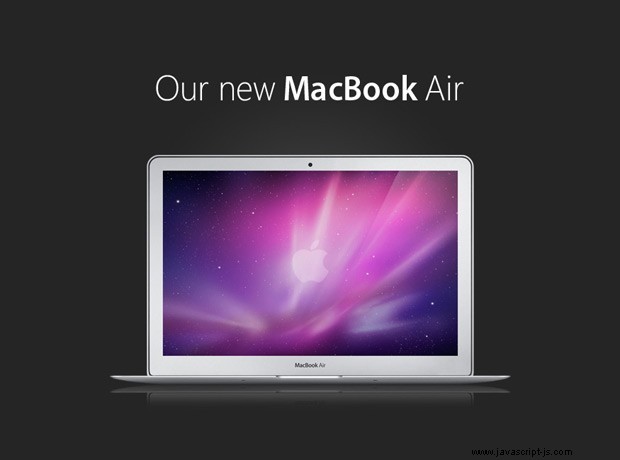
#promoIMG div 將 MacBook 插圖設置為其背景。當我們調用它時,這就是我們的插件要尋找的東西。然後它將創建一個初始屏幕 div 並將插圖設置為其背景,並對其進行偏移以使其與 #promoIMG 對齊 它下面的div。最後,當閃屏被隱藏時,給我們留下的印像是它周圍的頁面慢慢淡入。
CSS
我們有兩個不同的樣式表 - styles.css 和 splashscreen.css .第一個非常簡單,因為它只用於設置底層頁面的樣式,我們對它沒有興趣,這裡不再討論。定義初始屏幕外觀的樣式在它們自己的文件中分開 - splashcreen.css ,您可以在下面看到。
splashscreen.css
#splashScreen img{
    margin:0 auto;
}

#splashScreen{
    position:absolute;
    top:0;
    left:0;
    height:100%;
    width:100%;
    background-color:#252525;
    background-repeat:no-repeat;
    text-align:center;
}
在上面的片段中,我們基本上是說樣式表 div 相對於文檔窗口絕對定位,並且它應該佔據頁面的整個寬度和高度。背景顏色與 MacBook 插圖的顏色相同,我們將其用作背景圖像,稍後您將看到。
jQuery
所有插件代碼都駐留在 jquery.splashscreen.js 中 .正如我在教程的第一部分中提到的,在向用戶顯示任何內容之前加載腳本很重要,否則他們會在顯示啟動畫面時看到令人不快的閃爍。
jquery.splashscreen.js
// A self-executing anonymous function,
// standard technique for developing jQuery plugins.

(function($){

    $.fn.splashScreen = function(settings){

        // Providing default options:

        settings = $.extend({
            textLayers      : [],
            textShowTime    : 1500,
            textTopOffset   : 80
        },settings);

        var promoIMG = this;

        // Creating the splashScreen div.
        // The rest of the styling is in splashscreen.css

        var splashScreen = $('<div>',{
            id  : 'splashScreen',
            css:{
                backgroundImage     : promoIMG.css('backgroundImage'),
                backgroundPosition  : 'center '+promoIMG.offset().top+'px',
                height              : $(document).height()
            }
        });

        $('body').append(splashScreen);

        splashScreen.click(function(){
            splashScreen.fadeOut('slow');
        });

        // Binding a custom event for changing the current visible text according
        // to the contents of the textLayers array (passed as a parameter)

        splashScreen.bind('changeText',function(e,newID){

            // If the image that we want to show is
            // within the boundaries of the array:

            if(settings.textLayers[newID]){
                showText(newID);
            }
            else {
                splashScreen.click();
            }
        });

        splashScreen.trigger('changeText',0);

        // Extracting the functionality into a
        // separate function for convenience.

        function showText(id){
            var text = $('<img>',{
                src:settings.textLayers[id],
                css: {
                    marginTop : promoIMG.offset().top+settings.textTopOffset
                }
            }).hide();

            text.load(function(){
                text.fadeIn('slow').delay(settings.textShowTime).fadeOut('slow',function(){
                    text.remove();
                    splashScreen.trigger('changeText',[id+1]);
                });
            });

            splashScreen.append(text);
        }

        return this;
    }

})(jQuery);
插件被傳遞了一個設置對象。該對象唯一需要的屬性是 textLayer .此屬性應該是一個數組,其中包含所有帶有促銷短語的圖像的 URL,這些圖像在 MacBook 插圖上方淡入淡出。您可以使這個數組任意長,甚至可以在其中放置任何類型的圖像,而不僅僅是包含文本。你甚至可以把它變成一個時尚的幻燈片。
這個 該功能對應於promoIMG 分區。請注意我們如何使用 offset() 從頁面頂部獲取圖像的偏移量 第 25 行的方法,並將其設置為啟動屏幕上背景圖像的偏移量。這為我們提供了完美的對齊方式,同時使我們不必將偏移量作為參數傳遞,從而使插件更加健壯。
您可以在下面的片段中看到該插件是如何使用的:
script.js
$(document).ready(function(){

    // Calling our splashScreen plugin and
    // passing an array with images to be shown

    $('#promoIMG').splashScreen({
        textLayers : [
            'img/thinner.png',
            'img/more_elegant.png',
            'img/our_new.png'
        ]
    });

});
剩下的就是只調用閃屏插件。文檔就緒事件非常適合該任務,因為它在頁面對用戶可見之前被調用,我們可以安全地立即顯示屏幕。
有了這個,我們的類似 Apple 的 Splash Screen 插件就完成了!
離別詞
您可以使用該插件輕鬆創建自己的時尚介紹啟動畫面。您只需要記住將其限制在您的一個頁面上,因為如果他們必須在每個頁面視圖上等待 30 秒的介紹,這會讓用戶感到厭煩。此外,使用 textLayers 參數,您可以將其轉換為帶有不同產品截圖的幻燈片,這將是一個有趣的效果。
請務必在下面的評論部分分享您對此腳本的想法。