快速提示:向您的站點添加進度條
自移動出現以來,網站越來越多地變成“應用程序”。對本地運行的應用程序有意義的概念被轉移到網絡上。其中之一是最近在 Google 的一些網站中添加了“進度條”,以顯示頁面的加載狀態。
在這個快速提示中,我們將使用新的 NProgress jQuery 插件向網頁添加進度條。如果您想了解更多信息,請繼續閱讀!
NProgress 插件
NProgress 是一個 jQuery 插件,它在頁面頂部顯示交互式進度條,靈感來自 YouTube 上的進度條。它由一個全局對象 - NProgress 它包含許多您可以調用以推進進度條的方法。以下是這些方法的快速演示:
$(function(){

    // Quick Load

    $('button.quick-load').click(function(){
        NProgress.done(true);
    });

    // Incremental Load

    $('button.show-progress-bar').click(function(){
        NProgress.start();
    });

    $('button.load-one-item').click(function(){
        NProgress.inc();
    });

    $('button.finish').click(function(){
        NProgress.done();
    });

    // Percentage Load

    $('button.set-to-25').click(function(){
        NProgress.set(0.25);
    });

    $('button.set-to-75').click(function(){
        NProgress.set(0.75);
    });

});
<div>
<h1>Quick Load</h1>
<p>Show the progress bar quickly. This is useful for one-off tasks like AJAX requests and page loads.</p>
<button class="quick-load">Quick Load</button>
</div>
<div>
<h1>Incremental Load</h1>
<p>The progress bar is incremented with every element that is loaded. This can be useful in web apps that load multiple items.</p>
<button class="show-progress-bar">Show Progress Bar</button>
<button class="load-one-item">Load An Item</button>
<button class="finish">Finish Loading</button>
</div>
<div>
<h1>Percentage Load</h1>
<p>NProgress lets you set the progress bar to a specific percentage. This can be useful in apps where you know the total number of the items to be loaded, so you can calculate the percentage. This is the technique that we will use in the demo.</p>
<button class="show-progress-bar">Show Progress Bar</button>
<button class="set-to-25">Set to 25% Loaded</button>
<button class="set-to-75">Set to 75% Loaded</button>
<button class="finish">Finish Loading</button>
</div> *{
margin:0;
padding:0;
}
body{
font:14px/1.3 'PT Sans', sans-serif;
color: #5e5b64;
padding:40px 40px 0;
}
h1{
font-size:18px;
padding-bottom:4px;
}
button{
background-color: #78bad6;
box-shadow: 0 0 5px #8fcde7 inset, 0 1px 1px #eee;
display: inline-block;
padding: 9px 15px;
margin: 20px auto 20px;
font-weight: bold;
font-size: 12px;
text-align: center;
color: #fff;
border-radius: 2px;
box-shadow: 0 1px 1px #e0e0e0;
border: 0;
opacity:1;
cursor: pointer;
}
button:hover{
opacity: 0.9;
}
插件 github 頁面建議你連接 NProgress.start() $(document).ready() 的功能 回調和 NProgress.done() 到 $(window).load() 這是集成插件的一種非常簡單的方法。這不會顯示真正的進度(因為您必須監控頁面中包含的所有資源並手動增加進度條),但是大多數人不會注意到。
現在您已經對如何使用 NProgress 有了一個很好的了解,讓我們做一個更複雜的示例 - 一個在加載圖像時顯示進度條的畫廊。該欄將對應於實際加載的圖像數量。
畫廊
像往常一樣,我們從 HTML 標記開始。這次很簡單,我們只需要一個 div 來保存照片,和一個加載按鈕:
index.html
<!DOCTYPE html>
<html>
<head>
<meta charset="utf-8"/>
<title>Quick Tip: Add a Progress Bar to Your Site</title>
<link href="http://fonts.googleapis.com/css?family=PT+Sans+Narrow:700" rel="stylesheet" />
<!-- The Stylesheets -->
<link href="assets/nprogress/nprogress.css" rel="stylesheet" />
<link href="assets/css/style.css" rel="stylesheet" />
</head>
<body>
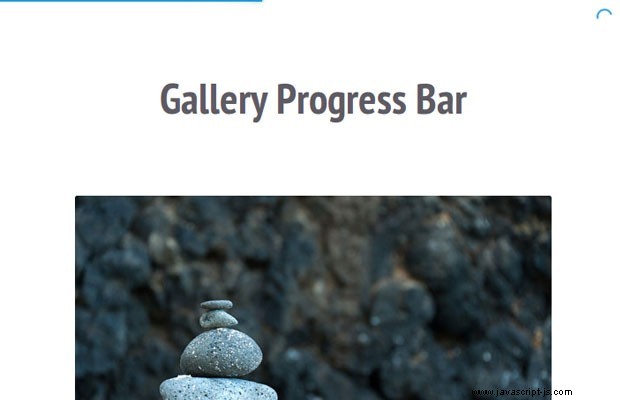
<h1>Gallery Progress Bar</h1>
<div id="main"></div>
<a href="#" id="loadMore">Load More</a>
<script src="https://cdnjs.cloudflare.com/ajax/libs/jquery/1.10.2/jquery.min.js"></script>
<script src="assets/nprogress/nprogress.js"></script>
<script src="assets/js/script.js"></script>
</body>
</html>
我在 <head> 中包含了來自 Google Webfonts 的自定義字體和兩個樣式表 , 以及結束 </body> 之前的三個 JavaScript 文件 標記。
在本教程的 jQuery 部分,事情變得更加有趣。在這裡,我使用 Deferred 對象連續顯示照片。這是必需的,因為我們希望照片並行下載(這要快得多),但要一個接一個地淡入視圖。這篇文章太短了,無法解釋 Deferreds 是如何工作的,但你可以通讀其中之一:鏈接、鏈接、鏈接。它們是一個強大的工具,可以簡化異步交互。
assets/js/script.js
(function($){

    // An array with photos to show on the page. Instead of hard
    // coding it, you can fetch this array from your server with AJAX.

    var photos = [
        'assets/photos/1.jpg',  'assets/photos/2.jpg',
        'assets/photos/3.jpg',  'assets/photos/4.jpg',
        // more photos here
    ];

    $(document).ready(function(){

        // Define some variables

        var page = 0,
            loaded = 0,
            perpage = 10,
            main = $('#main'),
            expected = perpage,
            loadMore = $('#loadMore');

        // Listen for the image-loaded custom event

        main.on('image-loaded', function(){

            // When such an event occurs, advance the progress bar

            loaded++;

            // NProgress.set takes a number between 0 and 1
            NProgress.set(loaded/expected);

            if(page*perpage >= photos.length){

                // If there are no more photos to show,
                // remove the load button from the page

                loadMore.remove();
            }
        });

        // When the load button is clicked, show 10 more images
        // (controlled by the perpage variable)

        loadMore.click(function(e){

            e.preventDefault();

            loaded = 0;
            expected = 0;

            // We will pass a resolved deferred to the first image,
            // so that it is shown immediately.
            var deferred = $.Deferred().resolve();

            // Get a slice of the photos array, and show the photos. Depending
            // on the size of the array, there may be less than perpage photos shown

            $.each(photos.slice(page*perpage, page*perpage + perpage), function(){

                // Pass the deferred returned by each invocation of showImage to
                // the next. This will make the images load one after the other:

                deferred = main.showImage(this, deferred);

                expected++;
            });

            // Start the progress bar animation
            NProgress.start();

            page++;
        });

        loadMore.click();
    });

    // Create a new jQuery plugin, which displays the image in the current element after
    // it has been loaded. The plugin takes two arguments:
    //  * src - the URL of an image
    //  * deferred - a jQuery deferred object, created by the previous call to showImage
    //
    // Returns a new deferred object that is resolved when the image is loaded.

    $.fn.showImage = function(src, deferred){

        var elem = $(this);

        // The deferred that this function will return

        var result = $.Deferred();

        // Create the photo div, which will host the image

        var holder = $('<div class="photo" />').appendTo(elem);

        // Load the image in memory

        var img = $('<img>');

        img.load(function(){

            // The photo has been loaded! Use the .always() method of the deferred
            // to get notified when the previous image has been loaded. When this happens,
            // show the current one.

            deferred.always(function(){

                // Trigger a custom event on the #main div:
                elem.trigger('image-loaded');

                // Append the image to the page and reveal it with an animation

                img.hide().appendTo(holder).delay(100).fadeIn('fast', function(){

                    // Resolve the returned deferred. This will notifiy
                    // the next photo on the page and call its .always() callback

                    result.resolve()
                });
            });

        });

        img.attr('src', src);

        // Return the deferred (it has not been resolved at this point)
        return result;
    }

})(jQuery);
通過偵聽 image-loaded 的回調函數,每個加載的圖像都會增加進度條 自定義事件。這樣 showImage 功能是免費的,只處理照片的加載和顯示。
這樣,畫廊進度條就準備好了!