在 React 應用程序中為 jQuery 使用 Kendo UI
Kendo UI for jQuery 提供了 70 多個 UI 小部件,用於構建複雜的企業級 JavaScript 應用程序。然而,當今復雜的 JavaScript 應用程序需要的不僅僅是 jQuery。這就是為什麼在 Progress 中,我們正在試驗全新的、從頭開始重寫的、用於 React 組件的 Kendo UI。您可以在 Github 和 npm 上找到這些新組件,讓您與我們一起進行實驗。
React 組件的 Kendo UI 顯然還在試管中冒泡。這可能是 2016 年大部分時間的情況。我希望你檢查一下。但是,老實說,這些 KUI React 預覽組件現在無法幫助您構建 React 應用程序。
在本文中,我將展示如何將 React 組件包裝在用於 jQuery 小部件的 Kendo UI 周圍,以便可以在 React 應用程序中使用該小部件。但首先,讓我們先看看為什麼要這樣做。
React UI 工具包的現狀
當今需要一個稱職且完整的企業級 UI 工具包的 React 開發人員可以從頭開始創建所有內容,也可以使用下面列出的成熟 React UI 工具包之一:
- 反應小部件
- ZippyUI
- BlueKit
- 重低音
- 美女
- 索環
- 反應引導
- Material-UI
(注意:我不認為將來自不同開發人員的功能較弱的隨機組件粘合在一起作為一種選擇,這些組件很可能必須進行定制才能成為必須具有較長保質期的企業級應用程序的可行解決方案。)
如果開發人員選擇使用上面列出的其中一個 React 工具包,他們可能會發現沒有一個提供一整套強大的企業級小部件。其中一些確實提供了不錯的產品,但沒有一個能與 Kendo UI 為 jQuery 提供的專業產品相媲美(例如 Grid、Spreadsheet、TreeView、GanttChart、Charts 等)。
此外,它們都沒有提供官方支持系統。官方支持是許多開發人員忘記的工具功能,或者預先沒有足夠重視(但當出現問題時他們總是重視它)。在選擇工具時不要成為那個開發人員。確保您可以在需要時獲得幫助。
如果開發人員想要 Kendo UI for jQuery 中小部件的質量、支持和深度,但還需要 React 生態系統中的現代工具,他們應該怎麼做?換句話說,想要在 React 應用程序中為 jQuery 小部件使用 Kendo UI 的 React 開發人員應該怎麼做?這甚至可能嗎?
事實上,是的,這是可能的——也許並不理想,但完全有可能。我什至知道開發人員今天為生產應用程序這樣做,因為從頭開始為 jQuery Grid 構建類似 Kendo UI 的東西是不現實的。
事實上,通過包裝器或橋接器將 Kendo UI 引入工具並不少見。我們使用 Angular 1 做到了這一點。Aurelia 社區最近通過為 Kendo UI 創建了一個橋接器,以便它可以在 Aurelia 應用程序中工作。

包裝/橋接可以工作,而且只要 Kendo UI 可以做到,開發人員就會做到。
通過本文的其餘部分,我將展示如何將 React 組件包裝在用於 jQuery 小部件的 Kendo UI 周圍,以便可以在 React 應用程序中使用該小部件。由於 jQuery 的 Kendo UI 幾週前作為 CJS 模塊添加到 npm 中,因此為 React 構建包裝器並不是那麼困難。
正在使用模塊加載器(即 webpack)
在構建 React 應用程序時,可以安全地假設會使用 webpack 或類似的東西。當我描述如何將 Kendo UI jQuery 小部件包裝為 React 組件時,我幾乎不會花時間解釋使用 ES2015 模塊格式通過 webpack 加載模塊。如果您是 webpack 新手,請考慮在閱讀本文其餘部分之前學習 webpack 和 ES2015 模塊的基礎知識。
在 React 中使用非 React 代碼的實踐
大量的意見和策略伴隨著將舊的非 React 代碼混搭到 React 應用程序中。 React 官方規定了一個簡單的解決方案,並提供了一個基本的演示來幫助開發人員完成這項任務。此外,一些 React 社區領袖也提出了策略。
我從每個角度收集了一些見解,但最終我提供的解決方案對於 Kendo UI 小部件的性質來說是獨一無二的。我試圖平衡 React 開發人員的期望(和想要)與 Kendo UI 小部件及其 API 的現實和本質。不幸的是,該解決方案並沒有產生大多數 React 開發人員認為的理想 React 組件。
下面是我在為 Kendo UI 小部件構建 React 包裝器時的想法和決定的概要。仔細閱讀這篇文章,這樣你就不會想知道為什麼我在包裝非 React 代碼時使用 X 而不是 Y。
- 如果您單獨使用 jQuery,封裝的 Kendo UI 組件的名稱將與調用該組件的名稱相同(即
$().kendoDropDownList())。除了該組件將以大寫字母而不是小寫字母開頭(例如<KendoDropDownList/>不是<kendoDropDownList/>) 根據 React 標準。 - Kendo UI 封裝的組件接受五個屬性(
options,methods,events,unbindEvents,triggerEvents)。這些屬性用於容納和整合 Kendo UI 小部件 API。簡單來說,options是傳遞給 Kendo UI 小部件的典型選項集。methods是方法的名稱和要調用的任何參數。events是您希望附加到小部件的任何事件。unbindEvents刪除事件和triggerEvents觸發小部件事件。請記住,每次重新渲染包含 Kendo UI 包裝器組件的組件時,這些道具中的每一個都可以更改,這些更改將更新 Kendo UI 小部件。 - 使用 React 生命週期回調(在包裝器中)創建 Kendo UI 小部件後,不應在每次應用程序中的狀態更改時銷毀並重新創建它(即
shouldComponentUpdate: function(){return false;})。我選擇的策略是在第一次安裝 React 組件時創建一次小部件。然後,在那之後,組件只會在狀態發生變化時從上面得到屬性變化的通知。如果屬性與之前的屬性不同,則會使用小部件 API 來更新小部件。 - 上面的狀態變化應該會導致封裝的 Kendo UI 小部件的屬性發生變化。但是,React 狀態應該在被包裝的組件本身中使用。因為 Kendo UI 小部件提供了自己的數據處理機制(即
dataSource) 將 Kendo UI 的狀態概念與 React 混合起來似乎並不明智。最好的情況是,小部件的狀態可以保存在包裝 Kendo UI 包裝組件的組件中,將父狀態發送到 Kendo UI 包裝組件中,作為 Kendo UI 使用的屬性dataSource抽象(例如<KendoDropDownList options={{dataSource:[data]}} />)。這意味著當父狀態發生變化時,它將允許屬性更新,這可用於更改包裝的組件(例如.setDataSource())。 - 創建可用於包裝和實例化任何 Kendo UI 小部件的模式。
在一個 React 組件中為 jQuery 包裝 Kendo UI
下面的代碼是 webpack 設置中用於包裝 Kendo UI kendoDropDownList 小部件的模塊。
我將從代碼大綱開始,然後討論組件定義的每個部分(即傳遞給 React.createClass() 的屬性 )。閱讀下面的大綱和評論。
// import/require dependencies
import kuidropdown from 'kendo-ui-core/js/kendo.dropdownlist.js';
import React from 'react';
import ReactDOM from 'react-dom';
import deepDiff from 'deep-diff';

// create a React component, that is a wrapper for a Kendo UI widget
const KendoDropDownList = React.createClass({

    //component is in the DOM, so do stuff to it in this callback
    componentDidMount: function() {
    },

    //instance methods for updating widget
    triggerKendoWidgetEvents:function(events){
    },
    bindEventsToKendoWidget:function(events){
    },
    unbindEventsToKendoWidget:function(events){
    },
    callKendoWidgetMethods:function(methods){
    },

    //not called on inital render, but whenever parent state changes this is called
    componentWillReceiveProps: function(nextProps){
    },

    //don't run render again, create widget once, then leave it alone
    shouldComponentUpdate: function(){
    },

    //destory it, when the component is unmouted
    componentWillUnmount: function() {
    },

    //use the passed in React nodes or a plain <div> if no React child nodes are defined
    render: function() {
    }
});

//export the wrapped component
export default KendoDropDownList
大綱應該清楚地表明我們正在為我們的組件導入/需要幾個依賴項,創建一個 React 組件,然後導出該組件。我將從 componentDidMount 開始從上到下介紹上面大綱中的下一部分 .
我們為包裝器提供的第一個組件規範是在組件安裝到真實 DOM 時調用的函數(即 componentDidMount )。這是劍道 UI DropDownList 小部件將被實例化。
componentDidMount: function() {
    //get, child element node for this component
    var elementNode = this.elementNode = ReactDOM.findDOMNode(this);

    //determine if a selector was passed on which to invoke the KUI widget
    if(this.props.selector){
        elementNode = elementNode.querySelector(this.props.selector);
    }

    //instantiate and save reference to the Kendo UI widget on elementNode
    //note I am not using jQuery plugin to instantiate, don't want to wait for namespace on $.fn
    this.widgetInstance = new kuidropdown.ui.DropDownList(elementNode,this.props.options);

    //if props are avaliable for events, triggers, unbind events, or methods make it happen now
    this.props.events ? this.bindEventsToKendoWidget(this.props.events) : null;
    this.props.methods ? this.callKendoWidgetMethods(this.props.methods) : null;
    this.props.triggerEvents ? this.triggerKendoWidgetEvents(this.props.triggerEvents) : null;
    this.props.unbindEvents ? this.unbindEventsToKendoWidget(this.props.unbindEvents) : null;
}
componentDidMount 內 ,實例化小部件後,一組自定義/實例組件方法(例如 this.bindEventsToKendoWidget ) 被調用來處理 Kendo UI 小部件的設置(方法如下所示)。
//instance methods for updating widget
triggerKendoWidgetEvents:function(events){
    events.forEach(function(event){//loop over events, and trigger
        this.widgetInstance.trigger(event);
    }, this);
},
bindEventsToKendoWidget:function(events){
    Object.keys(events).forEach(function(event){//loop over events and bind
        this.widgetInstance.bind(event,events[event]);
    }, this);
},
unbindEventsToKendoWidget:function(events){
    events.forEach(function(event){//loop ove revents and unbind
        this.widgetInstance.unbind(event);
    }, this);
},
callKendoWidgetMethods:function(methods){
    Object.keys(methods).forEach(function(method){//loop over methods and call
        this.widgetInstance[method](...methods[method])
    }, this);
}
當 Kendo UI 小部件被實例化並且可能在屬性更改時調用這些方法。它們基本上採用方法和事件的屬性並使用這些值來調用 Kendo UI 小部件 API(即 bind() , unbind() , trigger() , widget.SomeMethod() )。
使用 componentWillReceiveProps ,我再次調用屬性更改時的方法,以及如果發送選項更改並且小部件支持 setOptions() .
componentWillReceiveProps: function(nextProps){
    //always update the widget with nextProp changes if available
    if(nextProps.events){
        this.bindEventsToKendoWidget(nextProps.events);
    }

    if(this.widgetInstance.setOptions){
        if(nextProps.options){
            this.widgetInstance.setOptions(nextProps.options);
        }
    }

    //try and determine if any of the nextProps have changed, and if so, update the widget
    if(nextProps.methods){
        if(deepDiff(nextProps.methods,this.props.methods)){
            this.callKendoWidgetMethods(nextProps.methods);
        }
    }

    if(nextProps.unbindEvents){
        if(deepDiff(nextProps.unbindEvents,this.props.unbindEvents)){
            this.unbindEventsToKendoWidget(nextProps.unbindEvents);
        }
    }

    if(nextProps.triggerEvents){
        if(deepDiff(nextProps.triggerEvents,this.props.triggerEvents)){
            this.triggerKendoWidgetEvents(nextProps.triggerEvents);
        }
    }
}
接下來,我使用 shouldComponentUpdate return false 的生命週期事件 ,以便創建一次小部件。
//don't run render again, create widget once, then leave it alone
shouldComponentUpdate: function(){return false;},
然後,我使用 componentWillUnmount React 清理 Kendo UI 小部件時的生命週期事件。
//destroy it, when the component is unmounted
componentWillUnmount: function() {
    this.widgetInstance.destroy();
}
最後,我定義了組件應該呈現給 DOM 的內容。一個 <div/> ,在其上應該調用我們的 Kendo UI 小部件,或者在使用該組件時發送的一組自定義元素(稍後會詳細介紹)。
//use the passed in React nodes or a plain <div> if no React child nodes are defined
render: function() {
    return this.props.children ? this.props.children : <div/>;
}
總而言之,在 React 組件中包裝 Kendo UI 小部件的模式如下所示:
// import/require dependencies
import $ from 'jquery';
import kuidropdown from 'kendo-ui-core/js/kendo.dropdownlist.js';
import React from 'react';
import ReactDOM from 'react-dom';
import deepDiff from 'deep-diff';

// create a React component, that is a wrapper for a Kendo UI widget
const KendoDropDownList = React.createClass({

    //component is in the DOM, so do stuff to it in this callback
    componentDidMount: function() {
        //get, child element node for this component
        var elementNode = this.elementNode = ReactDOM.findDOMNode(this);

        //determine if a selector was passed on which to invoke the KUI widget
        if(this.props.selector){
            elementNode = elementNode.querySelector(this.props.selector);
        }

        //instantiate and save reference to the Kendo UI widget on elementNode
        //note I am not using jQuery plugin to instantiate, don't want to wait for namespace on $.fn
        this.widgetInstance = new kuidropdown.ui.DropDownList(elementNode,this.props.options);

        //if props are available for events, triggers, unbind events, or methods make it happen now
        this.props.events ? this.bindEventsToKendoWidget(this.props.events) : null;
        this.props.methods ? this.callKendoWidgetMethods(this.props.methods) : null;
        this.props.triggerEvents ? this.triggerKendoWidgetEvents(this.props.triggerEvents) : null;
        this.props.unbindEvents ? this.unbindEventsToKendoWidget(this.props.unbindEvents) : null;
    },

    //instance methods for updating widget
    triggerKendoWidgetEvents:function(events){
        events.forEach(function(event){//loop over events, and trigger
            this.widgetInstance.trigger(event);
        }, this);
    },
    bindEventsToKendoWidget:function(events){
        Object.keys(events).forEach(function(event){//loop over events and bind
            this.widgetInstance.bind(event,events[event]);
        }, this);
    },
    unbindEventsToKendoWidget:function(events){
        events.forEach(function(event){//loop ove revents and unbind
            this.widgetInstance.unbind(event);
        }, this);
    },
    callKendoWidgetMethods:function(methods){
        Object.keys(methods).forEach(function(method){//loop over methods and call
            this.widgetInstance[method](...methods[method])
        }, this);
    },

    //not called on inital render, but whenever parent state changes this is called
    componentWillReceiveProps: function(nextProps){
        //always update the widget with nextProp changes if avaliable
        if(nextProps.events){
            this.bindEventsToKendoWidget(nextProps.events);
        }

        if(this.widgetInstance.setOptions){
            if(nextProps.options){
                this.widgetInstance.setOptions(nextProps.options);
            }
        }

        //try and determine if any of the nextProps have changed, and if so, update the widget
        if(nextProps.methods){
            if(deepDiff(nextProps.methods,this.props.methods)){
                this.callKendoWidgetMethods(nextProps.methods);
            }
        }

        if(nextProps.unbindEvents){
            if(deepDiff(nextProps.unbindEvents,this.props.unbindEvents)){
                this.unbindEventsToKendoWidget(nextProps.unbindEvents);
            }
        }

        if(nextProps.triggerEvents){
            if(deepDiff(nextProps.triggerEvents,this.props.triggerEvents)){
                this.triggerKendoWidgetEvents(nextProps.triggerEvents);
            }
        }
    },

    //don't run render again, create widget once, then leave it alone
    shouldComponentUpdate: function(){return false;},

    //destory it, when the component is unmouted
    componentWillUnmount: function() {
        $(this.elementNode).getKendoDropDownList().destroy();
    },

    //use the passed in React nodes or a plain <div> if no React child nodes are defined
    render: function() {
        return this.props.children ? this.props.children : <div/>;
    }
});

//export the wrapped component
export default KendoDropDownList
任何 Kendo UI 小部件都可以包裝在這種模式中並用作 React 組件。您可以在自己的應用程序中本地執行此操作,也可以使用我已經包裝並放置在 npm 中的小部件(注意:這些包的源代碼與您在上面看到的相同)。
讓我們在我為旋轉創建的 npm 中使用 jQuery React 包裝器的 Kendo UI。
使用 Kendo UI React-Wrapped 組件
在撰寫本文的過程中,我創建了一個新的 Kendo UI Boilerplate,用於處理 React 包裝的小部件。現在讓我們旋轉這個樣板。
前往 Kendo UI 樣板 GitHub 存儲庫 (https://github.com/kendo-labs/kendo-ui-boilerplates) 並下載或克隆存儲庫。然後按照這些說明啟動樣板代碼。
啟動樣板文件後,您應該會看到以下兩個 KUI dropDownList 瀏覽器中的小部件。
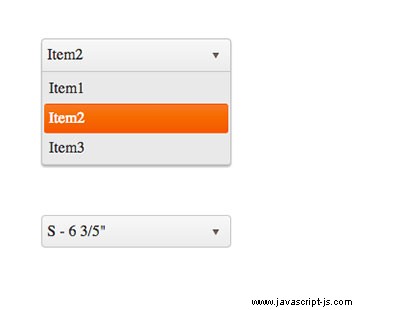
這些小部件被導入到 app.js 然後在 React App 中使用 零件。下面,我只顯示 App 中使用的組件 組件。
<KendoDropDownList
    //only updates upon state change from above if widget supports setOptions()
    //don't define events here, do it in events prop
    options={{ //nothing new here, object of configuration options
        dataSource:data,
        dataTextField: "text",
        dataValueField: "value"
    }}
    //updates if object is different from initial mount
    methods={{ //name of method and array of arguments to pass to method
        open:[], //send empty array if no arguments
        value:[fakeApropChange]
    }}
    //Right now, always updates
    events={{ //name of event, and callback
        close:function(){console.log('dropdown closed')},
        select:function(){console.log('item selected')},
        open:function(){console.log('dropdown opened')}
    }}
    //updates if array is different from initial mount
    unbindEvents={[ //name of event to unbind, string
        "select"
    ]}
    //updates if array is different from initial mount
    triggerEvents={[ //name of event to trigger, string
        "open",
    ]}>
        <input className="kendoDropDownList" />
</KendoDropDownList>

<KendoDropDownList>
    <select>
        <option>S - 6 3/5"</option>
        <option>M - 7 1/4"</option>
        <option>L - 7 1/8"</option>
        <option>XL - 7 5/8"</option>
    </select>
</KendoDropDownList>
您可能已經知道,<KendoDropDownList/> React 組件只是 Kendo UI dropDownList 的一個包裝器 小部件。事實上,這個樣板使用我們之前討論過的完全相同的代碼來包裝 dropDownList 小部件。繼續打開 kendoDropDownList.js 文件中的樣板文件並驗證這一事實。
這個樣板是為 React 應用程序創建自己的包裝 Kendo UI 組件小部件的完美大綱。但是,想像一下,如果所有的 KUI 小部件都已經為您包裝好了,那麼您所要做的就是 npm install 它們並使用它們。如前所述,我已經包裝了一些並將它們放在 npm 中。所以,讓我們刪除本地包裝的小部件(即 kendoDropDownList.js ) 並在樣板文件中使用其中一些 npm 包。
我將假設您仍然在運行樣板文件中的 webpack 和服務器進程。
接下來,npm 刪除 kendo-ui-core。
> npm remove kendo-ui-core --save然後,npm 安裝以下包。
> npm install kendo-ui-react-jquery-colorpicker --save
> npm install kendo-ui-react-jquery-dropdownlist --save
現在,打開 app.js 文件並刪除以下行
import KendoDropDownList from './kendoDropDownList.js';用這兩行替換它:
import KendoDropDownList from 'kendo-ui-react-jquery-dropdownlist';
import KendoColorPicker from 'kendo-ui-react-jquery-colorpicker';
最後,添加 <KendoColorPicker /> App 底部的選擇器代碼 組件渲染函數體,就在最後一個 <KendoDropDownList /> 之後 組件。
<KendoColorPicker selector="#kuicp"
    style={{marginTop:100}}
    options={{
        value:"#ffffff",
        buttons:false
    }} >
        <div style={{float:'right'}}><div id="kuicp"></div></div>
</KendoColorPicker>
保存 app.js 並且瀏覽器應該重新渲染並顯示從 npm 安裝的正在使用的新 React 組件。
到今天為止,我只在 npm 中放置了兩個封裝的組件(即 <KendoColorPicker /> 和 <KendoDropDownList /> )。你認為我應該包裝所有的 KUI 小部件然後放入 npm 嗎?在評論中告訴我你的想法。
Kendo UI CSS 文件很關鍵
我應該提到這些包裝器的一個非常重要的細節。要使用包裝器,您必須在使用組件的上下文中導入/包含 CSS 文件。例如,在樣板文件中,我使用 webpack 導入 CSS 文件。因此,為了在頁面上有正確的 CSS 以便小部件正常運行,我將 Kendo UI CSS 文件導入到 app.js 像這樣:
import 'kendo-ui-core/css/web/kendo.common.core.min.css';
import 'kendo-ui-core/css/web/kendo.default.min.css';
如果你將 npm 包引入到開發環境中,而不是像樣板一樣設置,你必須弄清楚 CSS 文件在哪里以及如何 import 將它們放入您使用組件的上下文中。如果您使用的是 webpack,它可能與我的做法類似。請記住,npm 包假定您將確保頁面中包含正確的 CSS 文件。
最後的想法
我相信為 jQuery 小部件包裝 KUI 是一個合法的解決方案,直到我們的 React 組件的 Kendo UI 與 jQuery 產品相匹配。事實上,開發人員一直在詢問這些信息已有一段時間了:
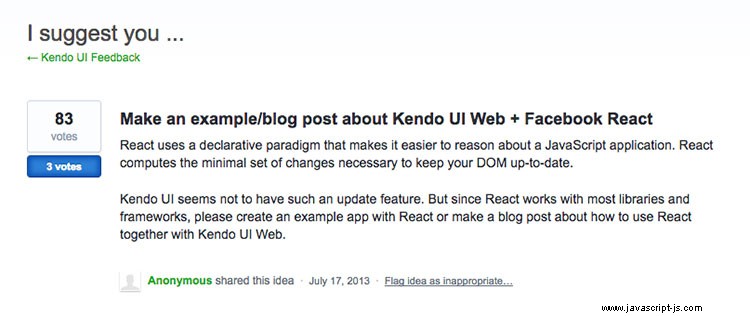
希望在 Progress 為 Kendo UI 提供真正的 React 組件之前,我在這裡提供的權宜之計就足夠了。在那之前,不要讓這阻止你在生產 React 應用程序中使用 Kendo UI。